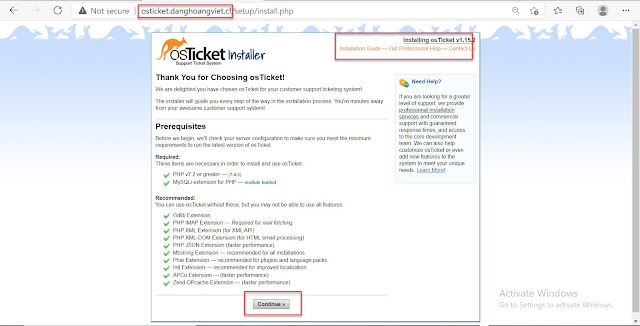
osTicket is a widely-used open source support ticket system. It seamlessly integrates inquiries created via email, phone and web-based forms into a simple easy-to-use multi-user web interface. Manage, organize and archive all your support requests and responses in one place while providing your customers with accountability and responsiveness they deserve
Lets install osTicket on Ubuntu 20.04 via steps bellow:
Step1: update system:
sudo apt-get update
sudo apt-get upgrade
Step 2: Install and Configure MariaDB database:
sudo apt install mariadb-server
sudo mysql_secure_installation
Set root password? [Y/n] yCheck MariaDB version:
New password:
Re-enter new password:
Password updated successfully!
Reloading privilege tables..
... Success!
By default, a MariaDB installation has an anonymous user, allowing anyone
to log into MariaDB without having to have a user account created for
them. This is intended only for testing, and to make the installation
go a bit smoother. You should remove them before moving into a
production environment.
Remove anonymous users? [Y/n] y
... Success!
Normally, root should only be allowed to connect from 'localhost'. This
ensures that someone cannot guess at the root password from the network.
Disallow root login remotely? [Y/n] y
... skipping.
By default, MariaDB comes with a database named 'test' that anyone can
access. This is also intended only for testing, and should be removed
before moving into a production environment.
Remove test database and access to it? [Y/n] y
- Dropping test database...
... Success!
- Removing privileges on test database...
... Success!
Reloading the privilege tables will ensure that all changes made so far
will take effect immediately.
Reload privilege tables now? [Y/n] y
... Success!
Cleaning up...
All done! If you've completed all of the above steps, your MariaDB
installation should now be secure.
Thanks for using MariaDB!
Step 3: Install & Enable Apache 2mysql -u root -pCREATE DATABASE osticket_db;GRANT ALL PRIVILEGES ON osticket_db.* TO osticket_dhv@localhost IDENTIFIED BY "YourP@ssword";FLUSH PRIVILEGES;QUIT;
sudo apt install apache2sudo systemctl start apache2sudo systemctl enable apache2
sudo apt-get install php php-{fpm,pear,imap,apcu,intl,cgi,common,mbstring,net-socket,gd,xml-util,mysql,bcmath}
sudo hostnamectl set-hostname osticket.danghoangviet.cfsudo apt-get install curl wget unzip
sudo wget https://github.com/osTicket/osTicket/releases/download/v1.15.2/osTicket-v1.15.2.zip
unzip osTicket-v1.15.2.zip -d osTicket
at this moment you should see 2 folders scripts & upload inside folder osTicket
Lets move osTicket to /var/www
sudo mv osTicket /var/www/Next create an osTicket configuration file for our system:
sudo cp /var/www/osTicket/upload/include/ost-sampleconfig.php /var/www/osTicket/upload/include/ost-config.phpChange ownership /var/www to user and group www-data.
sudo chown -R www-data:www-data /var/www/
sudo vi /etc/apache2/sites-available/osticket.danghoangviet.cf.conf
<VirtualHost *:80>
ServerAdmin danghoangviet@outlook.com
DocumentRoot /var/www/osTicket/upload
ServerName osticket.danghoangviet.cf
ServerAlias www.osticket.danghoangviet.cf
<Directory /var/www/osTicket/>
Options FollowSymlinks
AllowOverride All
Require all granted
</Directory>
ErrorLog ${APACHE_LOG_DIR}/error_osticket.danghoangviet.cf.log
CustomLog ${APACHE_LOG_DIR}/access_osticket.danghoangviet.cf.log combined
</VirtualHost>
sudo a2ensite osticket.danghoangviet.cfsudo systemctl reload apache2sudo apachectl -t
sudo chmod 0644 /var/www/osTicket/upload/include/ost-config.php
sudo rm -rf /var/www/osTicket/upload/setup/
Final: now you can access your osTicket which the link like below:
Your osTicket URL: http://osticket.danghoangviet.cf/
Your Staff Control Panel: http://osticket.danghoangviet.cf/scp


hi there
ReplyDeletei am new to os ticket, i try to install os ticket on respberry pi 4b,
but its show me just blank page when i try to access os ticket. i have run dollibarr on same respberry pi, its working fine. i have installed php 8.0. this would be problem. please any help will be great, thanks